Friday, April 29, 2011

Minor Kitchen Projects: before & afters

So anyone who has been to my house knows I really dislike my kitchen. Various shades of brown, tan, and what I affectionately call "puke" (I'm pretty sure that's an actual color...Crayola makes a crayon that color, right?) ...are not what I would have chosen. Ever. So in my efforts to brighten it, color it, tame it, anything really, my head just really hurt. We are not up for any major rennovations - cost wise or mess wise. I thought, "there has to be something I can do!" and I found this great stuff online, went to my local Lowe's and bought some Grout Refesh! I love it!! We are so very pleased with the results and I don't hate my kitchen anew every time I walk in there. Here's some before pics with our brown grout (who does that??)


And here's some in between pics. I bought the medium shade they had, there was at least one shade lighter and one darker. I got lucky, it matches so perfectly. Some different websites have a whole array of colors to choose fomr, i just wanted it to blend in! It's just like paint your scrub on with a toothbrush to fill in every little crevice, let dry, then wipe off the excess from the tiles. sticks to grout, not to tiles. Awesome.


And here's the after pics! I know! It's so uneventful, it's exactly what I wanted! (Of course, that's after my first choice of a custom glass tile backsplash...that's on hold.)


Yay! Bonus of this project is my entire backsplash, even behind the oven and the oven sides & back, got spring-cleaned like never before to prep the surface! It's so pretty and plain!

Monday, April 25, 2011

Painted Furniture Archives

Just for fun, a couple items from the past. An antique tabletop, a children's kitchen playset and a freebie coffee table from the side of the road we still have! Wish I could find pictures of the little kids' table & chairs sets from back in the day!


Friday, April 8, 2011

Tricky Days

Tricky Days here at the Crazy house! First the Leprechauns were very mischievous...they took everything green from around the house and made a mess! We think they had a party...looks like the green puffles did for sure! Now that it is April, Jackson still asks me if the lephrechauns did something we find out of order. They loved it :) APRIL FOOLS! Jackson asks me still, "Mommy did you April fool me?" Allen woke up early that Friday and I wispered, "sweetie, go back to sleep. You have a 2 hour delay it snowed out!" He looked outside and was not amused. I tried it on Nick but he just grunted and said, "Dad tried to tell me there was a sandstorm last year." The little boys took a while to catch on to the April Fools idea but they liked it. These pics are out of order, but I did have a bit of fun switching out mini pop tarts with pringles for the kids' lunches. Nick liked that joke the best... Here's a bag of the pop tarts taped back shut

And here's a peek at the pop tarts in the pringles package.
Hmm, what treat will you get?
I also traded colored bubbles for the regular bubbles for the little boys but we never got to that point. It was a rough afternoon LOL. But they're ready for some day. I'm not looking forward to that at all, it was such an incredible mess to switch them and those Crayola colored bubbles are smelly and really dark colored! My nails were stained underneath despite it being "washable".

Ah well, we'll see what next year tricky days bring!

Monday, April 4, 2011

Ribbon Archives

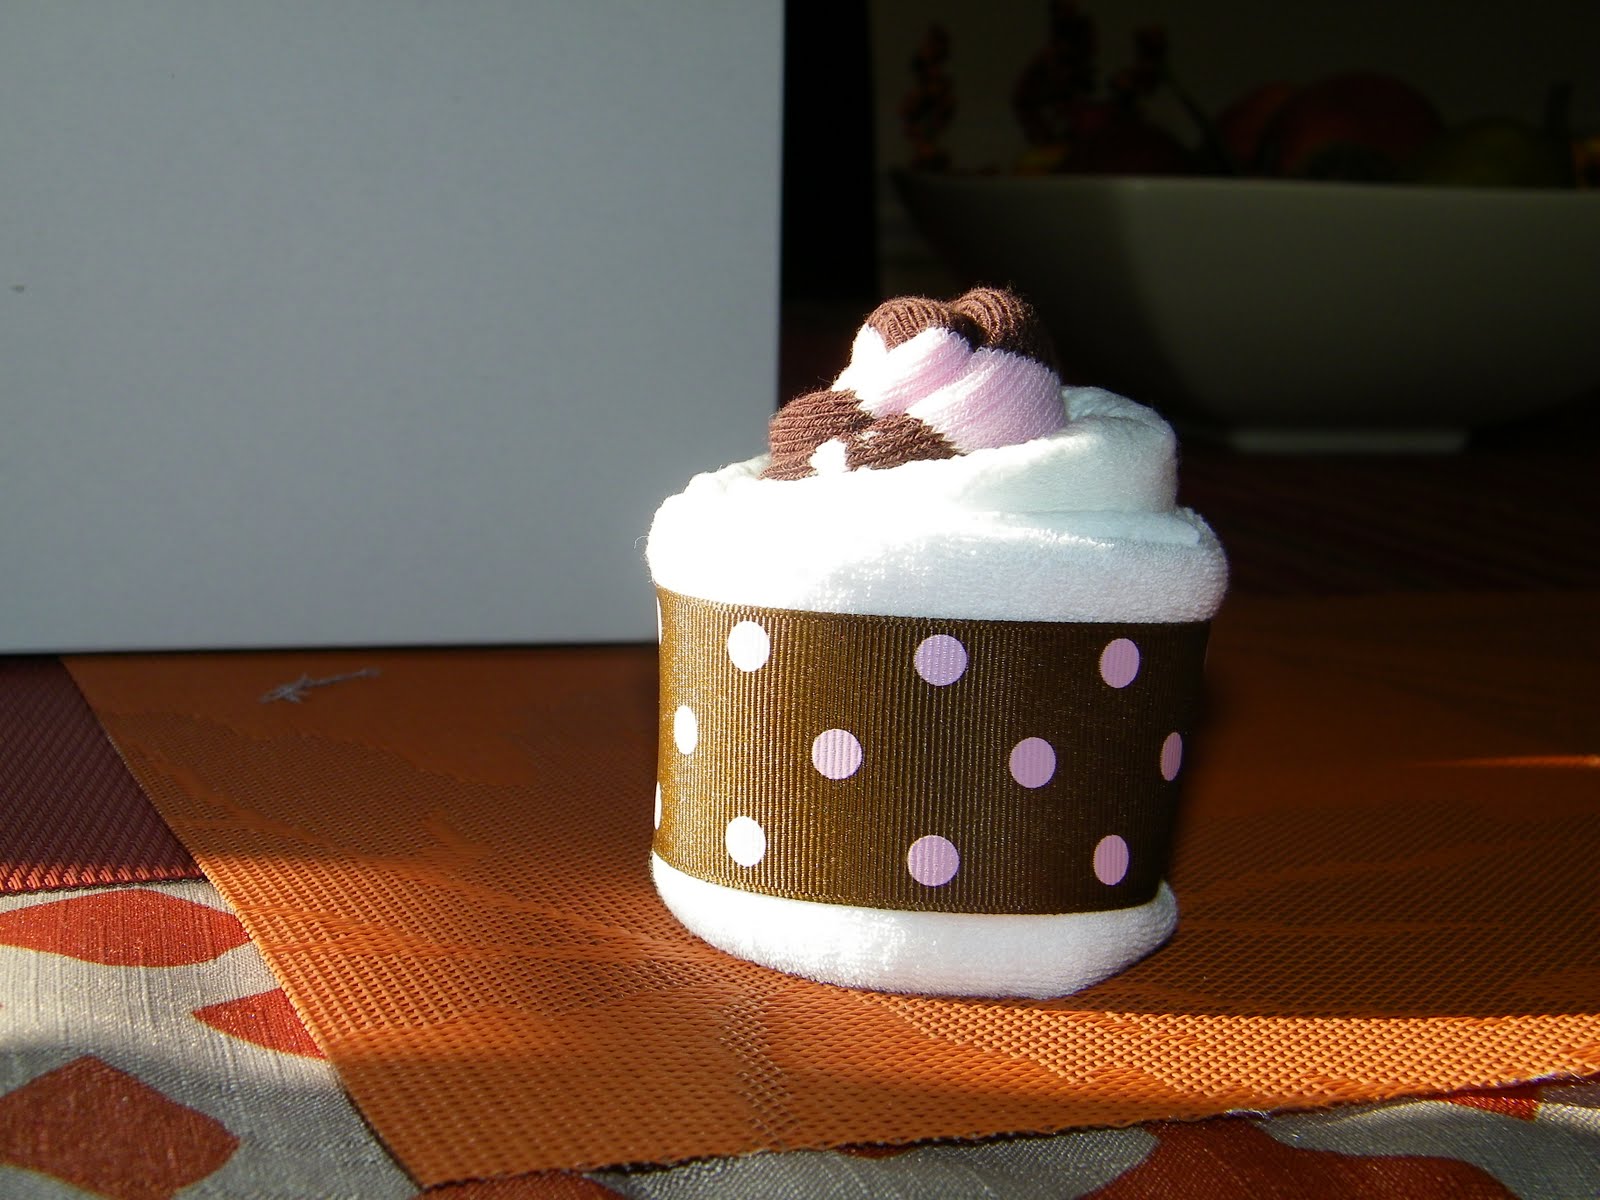
Found some older pics where I used Ribbon to make it pretty!! Enjoy~ This was a 1/2 dozen diaper cupcakes I made for neighbor. They each have a pair of newborn socks, a newborn diaper and a baby washcloth. Wrapped with a ribbon and placed each in a cupcake liner, delivered in a cake box. Love it!!


Here's my Kindle cover I made from an old sweater sleeve. Added a little ribbon tab to help to dig it out of my bag! Added a protective foam inner layer just to be sure.


This was a teacher gift I made for my son's 3rd grade teacher at the end of the year last year. I thought it turned out cute. That ribbon topper just reminds me of cheerleaders for some reason~

And I took a lilttle LKNM (lakenormanmommies) bow making tutorial and came up with these. Thankfully I at least had a little boy head to model...I don't think it will scar him for life :)


Sigh, if I only had a girl to use these on! I can always pass them on to my favorite-est niece if she hasn't outgrown bows. That's all! May look into other past creations to see what I've done and make more archives for you~ Thanks for looking!!

Sunday, April 3, 2011

Scrabble Tile Pendants!


These are so fun and they make great gifts! Just used scrabble tiles, cut scrapbook paper to fit, decopaged that on, coated with more Mod Podge (try the glitter Mod Podge for the top coat!) and finish with resin for the glossy, hardened surface. Add a silver bail or magnet to the back and voila! It's just cuteness!


Saturday, March 12, 2011

So I had this little wooden sign I decided to make functional...I thought it turned out pretty cute! I have to decide if I'm going to keep it on my front door or sell it now...

Monday, February 28, 2011

Upcycled Lego Crayons!

This is such a fun project! Something very satisfying about making all those little pieces of crayons in to sharp rectangles...not to mention peeling off the paper and sorting the colors! It's my Type A side I normally keep hidden!


This was perfect for Jackson & I to do on a sick day (we've had lots of those between the 6 of us in the last couple months!) He had so much fun. Step 1 was to sort the crayons and peel off LOTS of paper. I have since wised up and plan to use my exacto knife to speed up that process!
Thanks and credit here to my youngest 2 for the abundant broken crayon stash :x they completely destroyed a whole box of big brother's Crayolas... for fun apparently...what is wrong with my kids??

Then we filled the tray with similarly colored groupings of crayon bits. You have to use more than you think to make the finished crayons thick enough, they really melt down! I was so pleased to find this off brand silicone tray on ebay, the Lego brand ice cube tray can only be heated to like 130 degrees, this one can handle the 400 needed. And the finished "legos" are bigger than the lego brand.


Bake @ 400 for 10 minutes (almost exactly in my oven) And let them cool for longer than you think. You don't want them to snap when prying them out. (Besides, it gave me more time to peel another batch of crayons! Oi Vay.) I found it easiest to pull each crayon loose from the sides then peel back the silicone to remove. It peels right off!


Voila! Love our fun and funky crayons! (and no, they do not actually click together as one poor man-child complained about on his website! LOL) But they do color and look pretty cool. Can't wait to find some different shaped molds to try!